
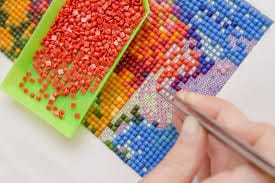
Diamond painting has become a popular hobby for art enthusiasts, offering a blend of creativity and relaxation as tiny resin diamonds are placed on adhesive canvases to create stunning designs. While smaller projects are great for beginners, tackling large diamond paintings can feel overwhelming due to their size and complexity. From finding the right tools to staying motivated, these challenges can make even experienced crafters hesitant. This guide provides practical strategies and tips to help you approach large diamond painting projects with confidence, breaking them into manageable steps to ensure an enjoyable and stress-free crafting experience.
Understanding Large Diamond Paintings
Diamond Paintings are exciting projects for those who want to create stunning, detailed works of art. However, they come with their own set of challenges. By understanding what makes these projects unique, you can approach them with confidence and enjoy the crafting experience without feeling overwhelmed.
What Makes Large Diamond Paintings Different?
Large diamond paintings stand out due to their size and complexity. Here’s what sets them apart from smaller projects:
● Size and Detail:
Larger canvases allow for more intricate designs, which means more diamonds and a longer process. While the size adds beauty and detail, it can also be overwhelming for those not prepared for the extra work.
● Longer Time Commitment:
The bigger the painting, the longer it takes to complete. With large diamond paintings, you’ll need patience and careful planning to manage the time required to finish. This is important to avoid rushing through the project and potentially feeling frustrated.
Key Components of Large Diamond Paintings
When working on a large diamond painting, understanding its key components will make the process smoother. Here’s what you need to know:
● Canvas Size:
Larger canvases, often ranging from 40×50 cm to 100×150 cm or more, allow for highly detailed designs but require significant space to work comfortably. Ensuring your workspace is large enough will make the process easier.
● Diamond Colours and Quantity:
With large diamond paintings, you’ll typically have more colons and a larger number of diamonds. This means organizing and keeping track of each colour to avoid confusion during the process. Having labelled storage containers helps keep your diamonds sorted and easy to access.
● Tools and Accessories:
You’ll need specific tools for large diamond paintings. Multi-placer pens, light pads, and bigger trays help speed up the placement process and make the job more comfortable. Additionally, having a good organization system for your tools and diamonds will save you time and frustration.
● Adhesive Coverage:
A larger canvas means a larger adhesive surface, which requires extra care. You’ll want to work in sections to avoid the adhesive getting dusty or damaged before you’re ready to apply diamonds. Covering unused areas with parchment paper or a plastic cover helps protect the canvas.
Why Choose Large Diamond Paintings?
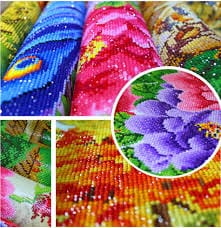
Large diamond paintings offer more than just a challenging experience—they create breathtaking results. Here’s why many crafters choose to take on the bigger projects:
● Impact and Beauty:
The finished piece of a large diamond painting is a showstopper. Its size allows for detailed and vibrant designs that truly shine, making it perfect for display in your home or office.
● Sense of Accomplishment:
While completing a large diamond painting can take time, the sense of pride when you finally finish is unmatched. The finished work is not only beautiful but also a testament to your dedication and patience.
In conclusion, large diamond paintings are a rewarding challenge for crafters who want to create eye-catching, detailed artwork. By understanding the components involved and properly preparing, you can enjoy the process without feeling overwhelmed.
Preparing for Success
Getting ready for a large diamond painting project is essential to ensure it goes smoothly. Proper preparation will help you stay organized and motivated throughout the process.
- Choosing the Right Kit
Pick a diamond painting kit that matches your experience level and interests. Make sure the design is something you’ll enjoy working on, as this will help you stay motivated. Larger kits require more time and attention, so be prepared for the commitment. - Setting Up Your Workspace
Choose a well-lit area with enough space to work comfortably. A clean, organized workspace will help you stay focused and avoid unnecessary frustration. Make sure everything you need is within reach. - Gathering the Right Tools
Having the right tools is important for efficiency. Ensure you have:- Applicator pens or multi-placers for diamond placementTrays and containers to sort diamonds by colourWax or adhesive to keep your pen tips working smoothly
- A light pad to clearly see the symbols on the canvas
- Creating a Comfortable Environment
Work in a comfortable chair with good back support, and take breaks to avoid strain. Proper lighting is crucial, especially for detailed work on a large diamond painting. This will reduce eye fatigue and make it easier to see the small symbols.

In conclusion, good preparation sets you up for success. By selecting the right kit, organising your space, and gathering the necessary tools, you’ll be ready to enjoy the process of completing your large diamond painting with ease.
Effective Techniques for Large Projects
When working on a large customized diamond painting, using the right techniques can make the process faster and more enjoyable. These methods help keep you organised and ensure the final result is perfect.
● Sectioning the Canvas:
Divide the large diamond painting into smaller sections. Use washi tape or release paper to mark areas you’ll work on at a time. This makes the canvas more manageable and prevents the adhesive from collecting dust.
● Using Multi-Diamond Applicators:
A multi-placer tool allows you to place several diamonds at once, saving time on large areas. This technique is especially helpful for filling in large sections of the same colour quickly and efficiently.
● Color-Coding Your Diamonds:
Sort your diamonds by colour and label the containers. This system helps you easily find the right colour when you need it and keeps your workspace neat.
● Working from Top to Bottom:
Start at the top of your large diamond painting and work your way down. This prevents smudging or disturbing the diamonds you’ve already placed. It’s also helpful to work in sections, focusing on one area at a time.
● Keeping the Canvas Covered:
When you’re not working on a section, cover the exposed adhesive with parchment paper or a protective cover. This keeps it sticky and free from dust, ensuring the diamonds stick properly.
In conclusion, applying these techniques to your large diamond painting project will make the process easier and more organised. With strategies like sectioning, color-coding, and using multi-diamond applicators, you can enjoy a smoother, quicker crafting experience.
Mindset and Motivation
Having the right mindset and staying motivated are essential when working on a large diamond painting. With the right approach, you can enjoy the process and stay on track until your project is complete.
- Set Small, Realistic Goals
Break your project into smaller tasks, like completing a section each day. This helps you stay focused and gives you a sense of accomplishment. - Celebrate Progress
Reward yourself after finishing each section or milestone. This keeps you motivated and makes the process more enjoyable. - Be Patient
Large diamond paintings take time. Be patient with yourself and understand it’s okay to take breaks when needed. Rushing can make the experience stressful. - Make It Relaxing
Treat your diamond painting as a relaxing hobby. Play music, listen to a podcast, or watch a show while working to make it more enjoyable. - Join a Community
Connect with others who enjoy diamond painting. Sharing your progress and getting tips can keep you inspired and motivated.
In conclusion, staying positive and motivated is key to completing a large diamond painting. By setting small goals and celebrating your progress, you can enjoy the journey and feel proud of your finished artwork.
Finishing and Displaying Your Masterpiece
After completing your large diamond painting, the final steps are crucial to preserving and Displaying the Diamond Painting. With a few simple actions, you can ensure your painting looks its best and lasts for years.
- Secure the Diamonds
Press down gently on the diamonds to make sure they’re firmly attached to the canvas. You can use a soft cloth or rolling pin to apply light pressure across the surface. - Trim the Edges
Carefully trim any excess canvas around the edges. Leave a small border to avoid damaging the design and give it a clean finish. - Frame Your Artwork
Framing your diamond painting is the best way to protect it. Choose a frame that fits your design and holds the canvas securely. A frame with a mat can add a professional touch. - Choose the Right Location
Hang your finished painting in a well-lit area where it can be admired. Avoid direct sunlight to prevent fading, but choose a spot with enough light to highlight the diamonds’ sparkle. - Keep It Clean
Dust your diamond painting regularly with a soft cloth. If it’s framed, the frame will protect it from dirt and damage, keeping it looking fresh.
In conclusion, finishing and displaying your large diamond painting the right way ensures it stays beautiful for years. Proper framing, placement, and care will help you enjoy your masterpiece long after you’re done crafting.
Embracing a large diamond painting project with confidence can lead to a truly rewarding experience. By focusing on key strategies, such as preparing your workspace, using effective techniques like sectioning and multi-placers, and maintaining a positive mindset through small goals and celebrations, you can stay organised and motivated throughout the process. As you complete your masterpiece, take pride in your work and consider sharing it with the crafting community. Connecting with others not only provides encouragement but also inspires future projects. Happy crafting!
1 comment
Great article. I wanted to let you know that I just came across your site and have enjoyed reading your articles. Lastly, I would love to see your feed and hope you post again soon.